Black Squid Ink Risotto with Grilled Calamari
Black squid risotto can be found in many restaurants in Italy but not often anywhere else in the world. I suppose it is because it isn’t easy to find sepia ink. It is a powerful dye made from the ink of the cuttlefish. Where to buy it is the question. You can try to collect the ink bag when cleaning the squid, but this is difficult. It is often sold in small packets or bottles in some Italian specialty stores. You can ask your fish monger if he can order it for you. I buy it in small bottles at the fish section of the market in Switzerland or in Italy and store it in my refrigerator. I often make black tagliatelle and risotto and it always makes a big impression with guests. The ink is mild and doesn’t have a strong fishy flavor. It’s beautiful black silky color is impressive and best of all it is delicious mixed with shell fish of squid as I have here in this recipe.

Risotto Nero
Recipe Summary
Prep Time: 10 minutes
Cook Time: 20 minutes
Yield: 4 Servings as a side dish, 2 servings as a main course
Ingredients
1 cup Arborio rice
5 cups chicken broth or vegetable or fish stock broth
4 tablespoons butter
4 tablespoons extra virgin olive oil (light flavor)
1 small white onion, chopped
2 cloves garlic, chopped
1 cup good white wine
2 tablespoons seppia ink
Ground pepper
Salt as needed
Heat the stock and seppia ink in a pan and leave it on low temperature to keep it warm.

Sauté the onions and garlic in the olive oil in a sauce pan. When they are translucent, add the rice and allow the rice to become opaque in color stirring it for about 2-3 minutes on medium heat. Add the wine enough to cover the rice and stir. Cover the rice with broth until the rice has absorbed the liquid and then add more doing the same thing until the rice is al dente.

The cooking should be about 20 minutes. Remove the risotto from the stove and stir in the butter until it has melted into the rice. This will create a nice creamy risotto. Add salt to taste.

Note: If you wish you can add some squid rings or chopped the tentacles at the very end and cook only a few minutes. Squid cooks very fast and it will be nice and tender with just a few minutes cooking time.
Grilled Squid
PREPARATION
Remove the tentacles, sac, beak, eyes and spine and wash any sand off the squid. Using a kitchen scissors cut the squid lengthwise. You can either cut it in quarters or in half lengthwise. Make small incisions in both directions with a very sharp knife on the inside flesh of the squid.

This will help to keep the squid flat instead of curling up.
Place them on long wet skewers.

Place them on a very hot grill a few minutes on each side. You will see when they start to brown. Squid can become very rubbery so the timing is critical. Salt them immediately.
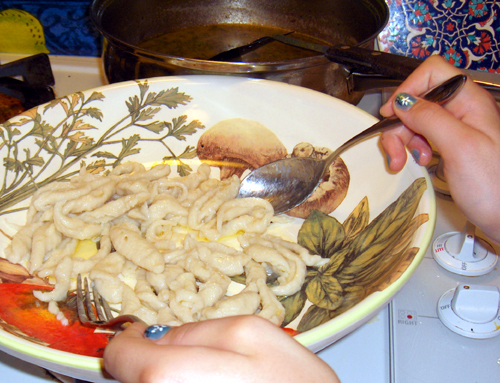
Spätzli And Game, A Swiss Specialty
Hunting season starts in September in Switzerland and the locals look forward to the hunt (Jagd). Switzerland strictly controls the hunt by setting limits to each species. The season lasts only about 3 weeks. Hunters bring their catch of mountain goat, wild boar, elk or deer to local butchers (Metzgerei). He prepares the animals into steaks, roasts, racks, bunderfliesh and hirschpfeffer, venison meat marinated in wine and a specialty here. It is not unusual to see a deer sitting in front of the butchers’ door waiting for him to arrive in the morning. After the hunter takes what he wants, the rest is sold by the butcher. If you are a good friend of the butcher, you can make your selection early in the season and have him store it for you in his freezer for the rest of the winter. When you want it, just give him a call and he will have your selection ready and waiting for you.
This is the start of Fall and the Alps are amazingly beautiful with the trees turning yellow and rust tones and light dusting of snow on the mountaintops. The anticipation of winter on its way moves people here. Winter is the bread and butter season in the Alps. The excitement begins with the hunting season, when the slow summer goes back to sleep and the cool air means getting the hay cut and into the barns, grapes harvested and the hotels and ski operations start preparations for the winter tourists.

Venison is traditionally served with spätzli and caramelized chestnuts. Spätzli is a thick batter that is scraped off a wet board into boiling water. It is similar to dumplings except looks more like pasta. Spätzli is a Swiss specialty and I can’t imagine venison without it. It also goes well with other meats and once you have learned to prepare it, you will find that when you are looking for something different to take the place of pasta or potatoes, spätzli is a very good substitute. The Austrians, Germans and Italian have their version of spätzli, but they are all pretty much the same except maybe for the size.
There is a gadget that is available to make spätzli but it is so simple by hand that I think it is a waste of money and effort to use it. I like the old fashion way.
Spätzli
Recipe Summary
Prep Time: 10 minutes
Cook Time: In boiling water approximately 2 minutes per späzli batch
Yield: 4 Servings
Ingredients
2 cups flour
1 egg
1/2 cup milk
1/2 cup water
1 teaspoon salt
2-3 tablespoons butter
Prepare a large pasta pan of boiling salted water. Mix the flour, egg, and water, milk and salt. The batter should have the consistency of thick pancake batter.
Dunk the board into the boiling water so that the board is wet.

Place a ladle full of the batter on the wet cutting board.

Holding the board over the boiling water, scrap small amounts of batter about the size of ziti macaroni into the boiling water. When they float to the top, which takes about 2 minutes, remove them to a dish. Toss them immediately with some butter to prevent them from sticking and continue finishing each batch.

When you are ready to serve, put a tablespoon or two of butter into a frying pan and toss the spätzli with the butter until they are warm.
Note: You can mix mashed beats, spinach or carrots etc. into the batter to make different colors and flavors. Broth can be substituted for the cooking water.
TV Dinner & Tuna Carpaccio
What does tuna capaccio have to do with sports? We have what we call sports TV dinners. When there is a sports event such as the upcoming US Open Tennis Tournament, or a baseball, football world series, or the Olympics, these are TV dinner nights. No, not frozen TV dinners, but moving dinner from the dinning room table to the cocktail table. We don’t often eat in front of the TV, but a sports event is a good excuse. Not that we make it less formal, as we still have a nice table setting, candles and of course wine.
On these evenings when we want something easy but still special. We might grill pizza in our fireplace, make a fondue or a racellette with boiled potatoes and conichones. Sometimes we get a little fancier and have caviar with chopped egg yolk, chopped egg white and chopped onions, or smoked salmon with toast. But when we can get fresh sushi style tuna, it is tuna carpaccio every time.
We start by buying excellent quality fresh tuna; it is warped in plastic wrap and put into the freezer for about 15 minutes. During this time I toast pignoli nuts and let them to cool. Chop fresh basil and slice sun dried tomatoes. When I have black olives from Puglia I’ll slice slivers and put this aside.

When the tuna is just beginning to freeze, remove it from the freezer and slice it very thinly. Layer the slices by overlapping them covering the dish completely.
The next step is sprinkling the nuts, basil, sun dried tomatoes and olives if you have them over the top. For this dish I like the flavor of light extra virgin olive oil from Puglia. This oil is perfect for fish, as it doesn’t have the strong pungent Tuscan oil flavor that is great for salads but not for fish. Next I sprinkle a few large grains of Mediterranean Sea Salt over the top, use the salt very sparingly. The salt is crunchy and adds a nice salty flavor when you bite a grain of salt now and then.

A nice light good quality Prosecco pares very well with this dish.
For dessert I like to have a cool lemony sorbeto drink. In summer I mix some lemon sorbet with half & half cream and lemoncello and beat it in the blender. If it is winter it will be my homemade Limoncello. Limoncello helps to naturalize the salt and fish taste. It is perfect after a fish dinner.
And then with some nice placemats and a candle burning we enjoy our favorite TV dinner and the game.
Tuna Carpaccio
Recipe Summary
Prep Time: 15 minutes
Yield: 2 people as a main course
Ingredients
1 lb Sashimi quality tuna
Fresh basil
8 Sun dried tomatoes
1/2 cup pine nuts (pignoli)
Extra Virgin Olive oil (very light)
Lemon juice
Sea salt (medium or large grain)
Put the tuna in the freezer for about 15 minutes. You don’t want to freeze it, but it should be at the point where it is just beginning to freeze. This makes it easier to cut paper-thin slices. Lay the tuna slices on a plate slightly overlapping them. Refrigerate until you are ready to serve.
Toast the pignoli nuts in a non-stick sauce pan. This can be done without any butter or oil. Remove them from the heat as soon as they start to brown; let the heat from the pan continue to brown them. They brown very fast and can easily burn. Put them aside to cool.
Julienne the sun dried tomatoes and olives if you have them and set them aside.
Just before serving, sprinkle the tuna with the sea salt. It gives a very nice taste to the tuna and also adds a little crunch. Roughly chop several pieces of fresh basil and set them aside.
Just before serving, sprinkle the toasted pine nuts, basil and sun dried tomatoes over the tuna. Drizzle olive oil and lemon juice over the top of the capaccio and serve cold.
A fresh dessert drink – Sorbetto Al Limone
http://turosdolci.pturo.com/a-fresh-dessert-drink-sorbetto-al-limone/

Limoncello: Sorrento’s Liquid Gold
http://turosdolci.pturo.com/limoncello-sorrentos-liquid-gold/

Summer Pasta with Strozzapreti, Arugula, Potatoes & Mussels
You hardly feel like cooking on hot summer days and yet fish and shellfish seem so perfect for light summer meals. They are also very easy and fast to prepare. I have a husband who just didn’t like fish but would eat shellfish. I solved this problem by taking him to a cooking class in Italy where just about all the dishes we prepared were fish. There were 4 chefs from a 5 star restaurant and just the two of us. I didn’t expect this, as it was a class at a hotel that we had gone to many times and advertised as a class for a maximum of 6 people. Seems we signed up for the first class of the season that started the beginning of June. Along the Adriatic, this is not high season and we were the only ones to register. The chefs wanted to do the class in any case, probably to test it out, how lucky was that!
I wondered how my husband was going to deal with eating the meals we prepared, as he really hated fish. My husband is a diabetic and it was important for him to change his diet that consisted mostly of meat. This class was the cure and he totally enjoyed every dish we prepared. He still eats meat, but today we have fish at least two or three times a week. The message is that if there is something you don’t like, it is worthwhile to learn how to prepare it. Many times you can find recipes that you never knew existed and will satisfy your taste.
The following is an easy recipe that is great as it includes greens, shellfish and pasta, what is there not to like!

Strozzapreti con rucola, patate e cozze
Chef Franco, Vieste (Foggia), Italy
Recipe Summary
Prep Time: 15 minutes
Cook Time: 20 minutes
Yield: 4 Servings
Ingredients
1 lb. strozzapreti, cavatelli or pasta of your choice
1 bunch arugula (rucola in Italian)
1/4 lb. of potatoes
1 lb. of mussels
2 cloves garlic, sliced
1 medium onion, chopped
4 tablespoons of extra virgin olive oil
1 pepperoncino

Wash the mussels thoroughly and let them soak for about 1/2 hour in cold water, changing the water a few times. Remove the beard that is between the shells. Steam them in a small amount of boiling salted water. This will take 3-6 minutes; discard any that have not opened. Strain out all the liquid and reserve it for the sauce. Remove most of the mussels from their shells, keeping about 5 per person for garnish.

Peel and cut the potatoes into small squares, par boil them in salted water. Set them aside.
In a skillet, sauté the oil and onions until they become slightly translucent. Add the garlic and pepperoncino and cook a few more minutes. Add the reserved mussel liquid and boil it down to about half. Add the cubed potatoes.

In a large saucepan, cook the strozzapreti in salted boiling water. Three minutes before the strozzapreti is cooked add the arugula in with the strozzapreti and cook until the strozzapreti are al dente. Drain them and toss them into the skillet blending them until they are completely covered with the sauce.
A Fish Story – In Search for Blue Fish & Striped Bass on Cape Cod
We have spent our summers on Cape Cod ever since we were kids and we loved to fish. Our family always thought that we should have the talent to be geat fishermen because my grandparents came from Gargano on the south of the Adriatic Cost of Italy, and my grandfather was a fisherman (pescatore). We stayed in a big house with my aunts and cousins and my father and uncles alternated days off during the week to join us. My family was in the food and restaurant business and the markets and restaurants were open 7 days a week at that time. We waited for them to arrive and prepared for our fishing trips to the Cape Cod Canal. We would come home from these trips sleepy, smelling of bait, no fish and disappointed but not deterred. After all, our grandfather was a fisherman; we must have inherited this passion from him.
We went to every bait store searching for the right bait. We talked to anyone who could give us fishing secrets or lures that were a sure thing. We paid attention to the tides and set our alarm clocks so that we were at the suggested fishing spots at the exact time the fish were running, and we caught no fish. Later when we older we bought a sailboat and continued the same routine, maybe this was the answer. We had tried fishing off the canal docks, off the rocks, on the beach and we bought all kinds of fishing poles and gear. We would see all the other boats pulling in the fish, the fish leaping out of the water all around us and still no fish. Then my brother decided the sailboat wasn’t the right boat and bought a Boston Whaler. This was surly the answer and the ritual went on and still no fish. I remember he caught a flounder and a bluefish once and this was a great occasion with photo’s and excitement and a grand fish dinner. I have to say that we had lobster traps and were much more successful catching more lobster then we could eat so not all was lost. There were summers when we decided we would catch everything we ate during a weekend. We were great at clamming and carried home buckets of steamers, little necks and mussels. We made calms on the half shell, chowder, pasta with clam sauce, calms casino, stuffed mussels, grilled, boiled, baked, stuffed lobster and pasta with lobster sauce, but no fresh grilled fish. We just couldn’t understand it, what was the problem after all we must have the gene; our grandfather was a fisherman in Italy how could we miss.

The next generation continued this search for the answer and was about to give up. My brother-in-law Peter and my nephew Nick experiencing the same curse went fishing one day and met up with a man who had caught several huge stripped bass. As usual they befriended him and he told them how to make his special lure. As we all laughed at them and said, “Oh here we go again” out they went searching for all the components and proceeded to make this new, magic lure. With trepidation mixed with a lot of hope they headed out to Nantucket Sound. They not only tackled the curse, they have been catching huge blue’s and stripped bass ever since, they broke the curse!

As all this was happening I went to Vieste, Italy searching for information about our grandparents. I was in a state of shock when I noticed his profession in the documents I found. He was not a fisherman but a shepherd (pastore). We should have been raising cattle not fishing. This just goes to show you how the translation of a word can effect your whole life. Our family being mostly 1st & 2nd generation Italian-American never learned to speak Italian and translated the word incorrectly. Well so goes the fishing talent that we thought we should have inherited.

We had a great time in our search for the big fish, and thinking our grandfather was with us, probably he was laughing at us. The most wonderful stories, laughs and memories of our efforts might not have been the same fun. It is like being told that Santa doesn’t exist and not being upset. Being together as a family on Cape Cod in the summer was the best part.
Grilled Whole Fish In Foil
Recipe Summary
Prep time: 20 minutes
Cook time: 30 minutes
Yield: 8 servings
Ingredients
1 18 lb. Fresh whole bluefish, striped bass, cleaned and gutted
1 large orange, skin and segments
2 fennels with stems
Salt & pepper to taste
Other things needed
2 large pieces of foil or parchment paper
PREPARATION
Scale and gut the fish and wash it inside and out. Salt and pepper the inside and outside of the fish.
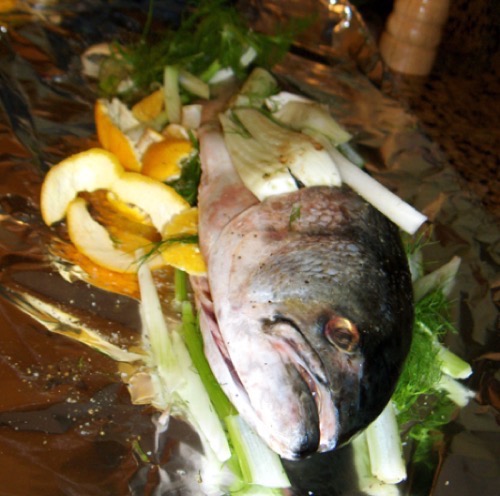
Lay out enough foil or parchment paper large enough to place the fish and eventually covering it with another piece of foil to form an envelope. Lay the fish on the foil.
Remove the skin of the orange and separate the orange segments. Cut the fennels into thick slices including the stocks and leaves.

Salt & pepper the fish outside and inside the cavity. Stuff cavity with the fennels, orange segments and orange rind.
Place another piece of foil over the top and crimp the edges of the foil to form an envelope.

BAKING/GRILLING
Place the fish on a hot grill or in the oven. If grilling the fish turn it over after 10-15 minutes. And grill it for another 10-15 minutes. The time depends on the size of the fish. Puncture the fish in the thickest part with a knife, if it is done it should go through easily. Don’t over cook as it will dry out.

Remove it from the grill and carefully open the envelope. Remove all the fennel and oranges.
SERVE
Remove the head and tail and fins on the top and bottom of the fish. With a sharp knife remove the skin on one side pulling it gently away from the flesh. Make a cut down the center and cut the fish into segments removing them with specula. If the fish is done the flesh will come off the bone easily. Turn the fish over and do the same to the other side.

Serve the fish with fennel and orange salad. Make a simple dressing of extra virgin olive oil and fresh lemon juice.

NOTE: Other fish can be prepared in this manner such as salmon, trout etc.
La recette: les anchois au sel (Anchovies Preserved in salt)
July 26, 2010
0 comments
Côte d'Azur, Fish, Food-Gastronomy, Food-Photography, Travel, Vacations
Patricia Turo
Schools of anchovies run twice a year in the Spring and September along the Ligurian Sea. They are cleaned and the innards are removed and layered in mer de sel (sea salt) in cylinder forms along the entire maritime region. Anchovies are the king of the Ligurian Sea.
The tradition of conserving anchovies in salt goes back to ancient times when they provided a stock of food in the cities and because anchovies and salt were used by the fisherman as merchandise to barter.

Preparation:
The quality of the anchovies is very important; they must be very fresh. Remove the heads and the innards, rinse them in running water and dry them with a cloth. Put a layer of salt at the bottom of a round container. Place a layer of anchovies and then a layer of salt paying careful attention to press them one against another until you reach the top. Finish the top with a layer of salt.
Close the top so that it is airtight and put a weight of least 3 km (7 lbs.) on the top. Store them in a cool place controlling them every two days removing any liquid that forms. Let them stay for 40 days and they are ready to eat. At this point if you wish you can scrape the salt off and transfer them into extra virgin oil.
Anchovies are used to flavor meats, sauces, in stuffing’s and stews. They are eaten fresh marinated in oil, fried, on pizza, in salads, and pasta sauce etc. Anchovies add flavor and give a unique aroma to dishes. Often it is not noticeable in a dish and you wonder what it is that gives it a flavor you never seem to be able to achieve in your cooking. Because it was used to salt dishes as stated above, it is still today a main ingredient in Italian cooking. Anchovies are your friend in cooking and will give you a unique advantage in creating that special flavor to your dishes.

I buy them salted, then clean off the salt and store them in a glass container or in a storage bag and keep them in my refrigerator. When using them, take them out and allow the oil to clarify. They have a more pungent flavor then the anchovies already put up in oil in cans. They can be found at most Italian specialty stores. Or buy fresh anchovies and try salting them yourself according to the recipe of San Remo.
Little grilled things -Grilled Stuffed Calamaretti
Years ago I had these succulent stuffed calamaritti in a small Italian restaurant in Monaco and have been making them ever since. They are so simple, but whenever I make them for a grill party, they are the hit of the meal. Calamaretti are a little difficult to stuff since the openings are so small and the mixture doesn’t go through a pastry bag very easily no matter how fine you chop the mozzarella. So you have to stuff them by hand. But the advantage is that you can prepare them before your guests arrive and put them on the grill for a little something special with a glass of cold white wine, and you will be rewarded with “special thanks to the chef”.

If you don’t have the time to stuff them, just clean them, grill them, lightly salt after grilling, and drizzle with a little good balsamic vinegar.

Involtini di Calamaretti con Mozzarella e Basilica
Recipe Summary
Prep Time: 15 minutes
Cook Time: 3-5 minutes, as soon as the squid will shrink and begins to brown. Do not over cook.
Yield: Antipasti-12 calamartti
INGREDIENTS
12 very small squids
2 medium size mozzarella balls
Several basil leaves
Salt, to taste
FILLING
Put the mozzarella and several basil leaves into a food processor and chop until the basil and cheese have melded together. Or you may chop both by hand very finely.
PREPARATION
Remove the tentacles, sac, beak, eyes and spine and wash any sand off the squid. Fill each tube with the cheese and basil mixture and close the opening with a toothpick. The opening of the squid is very small and is a little difficult to fill.


GRILL
Place the filled squid on a hot grill and cook for only few minutes turning them on all sides. Any longer and the squid will be very rubbery.

Salt them immediately after taking them off the grill and serve them immediately when they are hot and the mozzarella is still stringy.
Calamari Salad with Celery
Calamari salad is always on the antipasti menu in Italy. It brings the freshness of the sea, combined with fresh raw vegetables, the deep rich flavor of extra virgin olive oil and the tartness of fresh lemons. Add a variety of shell fish and you have frutti di mare. Served cold or room temperature this delicate salad is healthy, and sensational.
Although this is usually served as an antipasto, I make it as a main course for my husband and I. It is easy to make and although you want it to be as fresh as possible, it can be made a little in advance and stored in the refrigerator. The flavors meld and increase the intensity of the fish. It is a wonderful vegetarian dish as well as a special summer salad especially served with a dry white wine such as a Gavi di Gavi. Today calamari can be found in all fish markets and supermarkets, so you can enjoy either a calamari salad or frutti di mare year round.

Calamari Salad with Celery
Insalata di Calamari e Cuori di Sedano
Chef Francesco, Vieste, (FG) Italy
Recipe Summary
Prep Time: 15 minutes
Cook Time: 2 minutes
Yield: Antipasti
Ingredients
1 1/2 lbs of fresh calamari
1/4 cup of celery, chopped
6 tablespoons of extra virgin olive oil
2 tablespoons of fresh lemon juice
Parsley, chopped as desired
Salt & pepper to taste

Clean the calamari by removing the inner sack and spine. Pull the tentacles out and remove the beak behind the eye.

Cut the calamari tubes in 1” sections and boil the calamari in salted water for 2 minutes. Remove them and put them in a bowl of cold water to stop the cooking. Take them out of the water and dry them with paper towels.
Add the chopped celery, fresh juice of one lemon, chopped parsley and extra virgin olive oil. Sprinkle salt and a few grinds of black pepper and serve cold or at room temperature.

My version is to add boiled cubed potatoes, white cannellini beans or chickpeas and either celery or fennel. Quartered lemons and fresh chopped parsley adds color and flavor.
Linguine con salsa di acciughe
Anchovies are used to flavor many dishes in Italy from pasta’s to meats and stews. Their pungent salty flavor gives a special twist to a dish that is sometimes hard to identify. It is that flavor that you search for that makes a dish different and you wonder why yours doesn’t taste the same.
Anchovies are in the herring family and are usually sold packed in olive oil or salted but in Italy they are also often found fresh marinated in olive oil and herbs. They are widely used throughout the Mediterranean.
If buying them packed in salt, remove some of the salt by running the felts under water. Put them in a zip lock bag with extra virgin olive oil. They will last a long time if you keep them topped with olive oil. I use the oil to flavor pasta dishes and also to make salsa di acciughe served over linguini or spaghetti.
Whether they are mashed with garlic and spread over crostini or a few felts mixed in with a stew, you will immediately taste the difference.
The recipe for Linguini con salsa di acciughe is found in many parts of Italy but often not on many restaurant menus’. It is the primo piatto of my family’s Christmas Eve dinner along with mixed fried fish or as the Italians say “Peci Fritti” and Biscotti for dessert.
In the South raisins are added giving the sauce a slightly sweet flavor. Olives, capers or toasted breadcrumbs and toasted pignoli can also be added.

Linguine con salsa di acciughe
Recipe Summary
Prep Time: 15 minutes
Cook Time: 15 minutes
Yield: 6 Servings
Ingredients
1/2 cup olive oil
3 garlic cloves chopped
10 flat anchovies, (salted dry anchovies are stronger)
1 cup dry white wine
2 cups water
Freshly ground pepper to taste
1 small pepperoncino or red pepper flakes (optional)
1/2 cup raisins (optional)
1 1/2 lbs. Linguini
Salt to taste (before adding salt taste the sauce)
Run cold water over the salted anchovies and remove as much salt as possible. Place them in a container and cover them with olive oil. You can keep them in olive oil for a few weeks.
Cook the garlic and sauté it in the stored anchovy olive oil (if using canned anchovies in olive oil use this oil). Do not burn the garlic; cook on low heat for a minute. Chop the anchovies and add them to the pan, stir with a spoon. When the anchovies have dissolved, add the dried red pepper broken in half and wine. Grind black pepper to your taste. Do not add salt until you have tasted the sauce, usually it doesn’t need additional salt. The anchovies, even though washed still are very salty. Add 2 cups of water and allow it to cook on medium heat for 10 minutes. The anchovies will dissolve in the cooking process. You may have to add additional water to dilute the sauce if it is too salty.

Raisins are added in the South of Italy, and I find that they give the sauce a nice slightly sweet flavor. If you choose to add them, hydrate them in the wine and add them at the same time.
Cook the pasta in boiling unsalted water (check the sauce, it may have enough salt) until it still has a bite, strain it and add it to the sauce. Allow it to continue cooking in the sauce until al dente.

Add whatever ingredients listed below if desired. Allow the cooked pasta to absorb the sauce for several minutes before serving.
Note: Anchovies are used in Italy to flavor many dishes from sauces to roasts.
Note: Red pepper flakes can be sprinkled over the top by each person, if you prefer not to add pepperoncino into the sauce.
Note: The sauce can be strained or the anchovies can be left in the sauce. If you strain the anchovies, serve them in a small bowl so that your guests can add some back if desired. It is also very good spread on toasted bread (anchovy paste bruscchetta).
Note: Black olives and/or raisins can be added to the sauce if you desire a sweeter flavor; toasted pignoli nuts (pine nuts), toasted breadcrumbs and capers are often added to this dish in the south of Italy.
Although Linguini with anchovy sauce is served year round in Italy, it is always served in our family as part of our Christmas Eve dinner.
Homemade Pizza Dough
August 20, 2009
My grandparents came from Vieste (FG) Italy. In my quest to learn more about my heritage I went to Vieste and took a cooking program. My husband and I had 4 chefs at a five star hotel to ourselves for a week and learned many traditional dishes made in the village and Gargano. I’ve had many people ask me how to make pizza dough at home. The recipe below was given to me by Chef Marco at the Pizzo Munno Vieste Palace Hotel.

Recipe Summary
Prep time: 10 minutes
Cook time: N/A
Yield: 1 large pizza, 2 medium size pizzas
Ingredients
3 1/2 cups flour 00, reserve 1/2 cup for working the dough
1 1/2 teaspoon active dry yeast
1 teaspoon salt
1 teaspoon sugar
2 tablespoon extra virgin olive oil
1 cup water, tepid
PREPARATION IN A FOOD PROCESSOR
Put the water in a bowl and mix in the yeast and sugar. Place it in a warm place such as the oven and allow it to activate for about 15-20 minutes or until it doubles in size.
Put 3 cups of flour and salt in a mixer with the dough element and pour in the yeast mixture. Process it until it forms a ball. If working it by hand, place it in a bowl and mix the flour and yeast mixture with a wooden spoon or your hands.

Knead the dough lightly and place it in a bowl brushed with the olive oil and cover the bowl with a clean kitchen towel or plastic wrap. Place it in a warm place and allow it to rise for at least 1 hour.

Punch the dough down and let it raise for another 1/2 hour covered. You can use as much of the dough as you might need and freeze the rest. When defrosting it, allow the dough to raise again.

Roll out the dough using the reserved flour and you are ready to prepare your pizza, calzone, cheese bread, stromboli etc.

PIZZA SUGGESTIONS
When spreading the dough out, use your hands if you don’t want any air bubbles, use a rolling pin if for a flat crusty crust. I prefer stretching the dough with my thumb and the back of your hand. Use you finger tips to then rotate it on a board stretching it and turning it over a few times.
Most of us don’t have wood burning pizza ovens however; a pizza stone is the best solution for a home oven. You can also use terra cotta tiles, which can be bought in a home supply store. If you do this, purchasse 2 or 3 layers, they will keep the heat in really well and do the trick without spending a lot of money for a pizza stone. It is very important that you buy tiles that have not been made with chemicals.
Spread a medium grind semolina flour on the bottom of the pizza pallet, place the rolled out dough on the board and prepare your pizza. This will allow you to slide it off the board easily onto the tile or stone. flour will also do, but the dough slides off the wood palette more easily with semolina. You can also put parchment paper on the board and slide it onto the stone.
Cook the pizza in a very hot oven at least 500º F or as high as it will go. Put your pizza stone in the oven at least 1 hour until it is hot. If you are grilling it in a fireplace or on a grill, I have found that a metal grate works very well and makes it easy to turn it on the grill. I like this method because it also allows the heat to brown the bottom making it very crispy and gives it a smokey flavor. The coals should be red hot. The cooking time is about 15 to 20 minutes, but this depends on how high the heat is, so keep checking the bottom, it should be brown and crispy.


FILLING
Don’t be afraid to use whatever you like. Goat cheese, Gorgonzola, Fete cheeses are great as are olives, most vegetables, meats and seafood. Be creative!
You can use fresh tomatoes, or Passate di Pomador0 or just pureed can tomatoes. An Italian home is not complete without a bottle of Passate de Pomadoro in the refrigerator. It is great for flavoring soups and vegetables as well. Some people like to use prepared tomato sauce that has already been flavored, but I really prefer the fresh taste of tomatoes adding the herbs that you prefer. Sprinkle with chopped garlic, oregano or basil, salt and pepper; add whatever you like on the top. Mozzarella is traditionally used layered on the top. Whatever cheese you use, add it a few minutes before the pizza is done. Just long enough so that it melts. This allows everything to cook on top without the crust getting soggy or the cheese overcooking.
Return to main page
International Color Awards
